Crafting with Amanda Blog page 32

Huntington scraps from previous project used

I have been SLOWLY working towards cleaning out my crafting supplies and I found several packs that had a few projects left from a club night or workshop.   Here are the ones I found using Huntington papers.  I also have been intentional of using embellishments from my impressive hoard of embellishments.  Most are CTMH,  several have been retired for multiple years, and they are all useful!

DSC_0022 DSC_0020 DSC_0021 DSC_0034 DSC_0035

On Some of these I’m sure you notice the sunflower.  I was crafting with some of my friends and sharing with them the ease of creating these flowers.  We were experimenting with several sizes.  I also found the brass big brads and they worked perfectly in the smaller flowers!   Oh,  I should mention that one of my friends also had some Huntington scraps and shared with me a few of her “other colors.”  They were the small less than 2×2 pieces that I don’t think she wanted to use.  Worked perfectly for me!   I love embedded embossing too!

Happy Crafting!

White Pines Card Kit

Hi Everyone,

I’ve been truly going to town creating cards the last few months.  I’ve done a few scrapbook layouts,  but have spent much more time on cards than anything else.  (Trying to use up stash, fill Christmas gifts, and clean out old club night projects that have been taking up valuable real-estate in my studio.

In preparation for an upcoming class,  I put together the White Pines Card Kit.   Since I was going to be cutting paper,  and I can easily cut 2 sheets in the same time it takes me to cut one,  I found some paper I liked and cut two sets.  Really pleased with it.

DSC_0010a DSC_0009 DSC_0006

These first three cards are done as the direction instructed.  Great cards,  lots of variety in messages on the stamp set too.

Now,  Here are some samples I did using Sangria paper, gold glitter paper and the New Operation Smile Stamp Set, Animal Greetings  (on the back of the Annual Inspirations book.)

DSC_0027 DSC_0030 DSC_0029 DSC_0028 DSC_0031a

I also used September’s Stamp of the Month Paper garden,  and really like those too.

DSC_0032As you can see I did a little “rock and roll” technique.

For the last card from the extra papers I cut,  I used the stamp set from White Pines.     I don’t think I included earlier in this post that I added fundamental cards stock as one of my papers (Eggplant).

DSC_00260 DSC_0033

As you can see the instructions from these Workshops on the Go Kits can be used over and over again.   I think I’ve cut the blossom card kit four or five times now.   🙂

Happy Crafting!

Amanda


Mom’s Birthday Card

Hi Everyone,

Haven’t fallen off the edge of the world,  just trying to find a family routine working as “single parent” mode right now.  Husband has been given the opportunity to work on a short term project that involves him being away 12+ hours a day.  On the weekends he is then playing catch up with farm work, and I’m still playing house catch up from all the farm work and time helping Mom after her heart attack this summer.   Little insight to me:  I am of the mind the house work will patiently wait for me,  so I try and find a balance between getting projects done (like decluttering rooms) and family time.   So far the declutter projects are losing the battle of my time.

I made this card for my Mom for her birthday.  I was really pleased with it.  Her favorite color is blue,  so of course I choose our new sapphire color.

MomsBdayCardsmI used the inkblot stamp set on white flowers I cut using the Art Philosophy Cartridge.     Thought it was a good card for Mom to celebrate the anniversary of her birth.

I have lots of cards I’ve created recently,  and will be posting the workshops on the go from last year’s paper packs.  This is more for my ladies,  but you can always copy the layouts using different papers.  😉

Happy Crafting!


My New Stamp Set Swap Card

It’s been several years since I’ve participated in a swap,  but I did it.  We were asked to pick 5 stamp sets from the new Annual Inspirations book, then we were assigned one from our list.  I got Ink Blot as my stamp set, and was really excited to get to work.

swap card
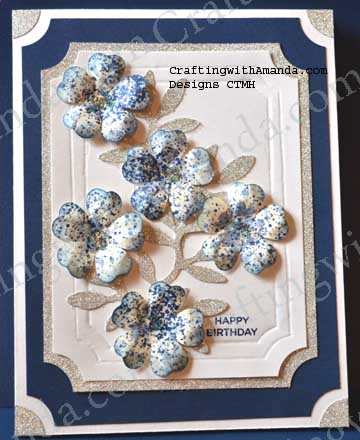
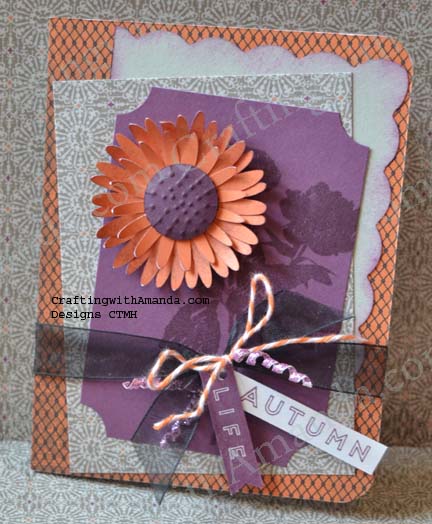
Here is my final product,  but I’ll give you some tips and my thought process in creating this.  (I’m really pleased with the results!)

ink blot

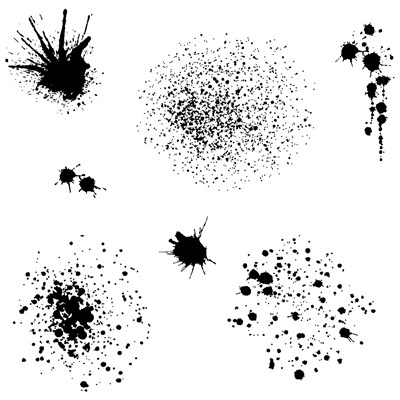
I knew that many consultants like to create some “noise” using background stamps,  and there are hundreds,  if not thousands of examples of that on pinterest.  I wanted to do something more with the stamps.

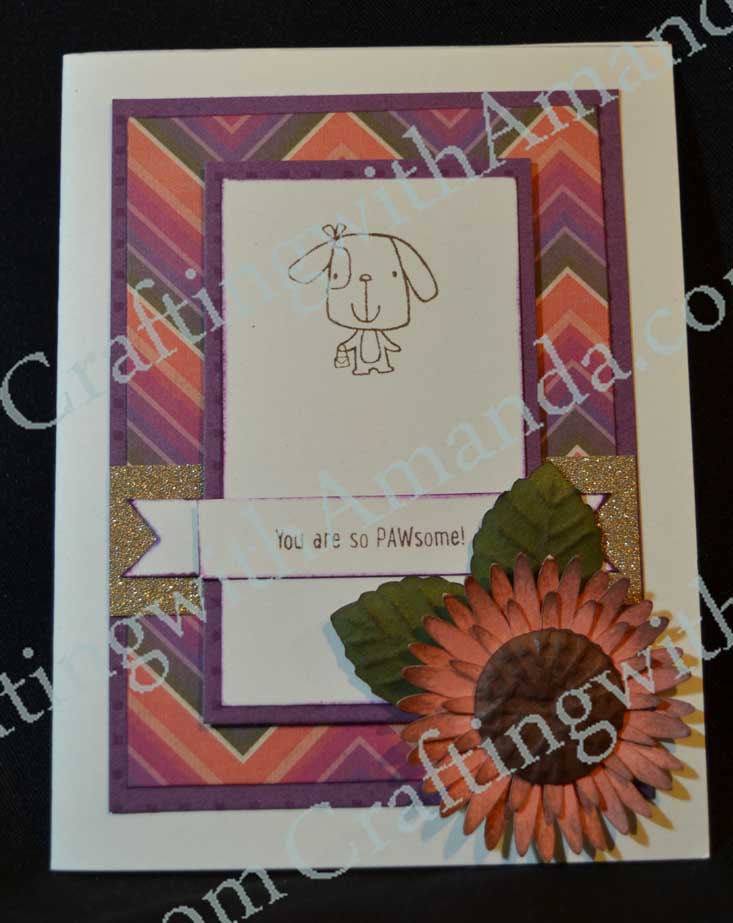
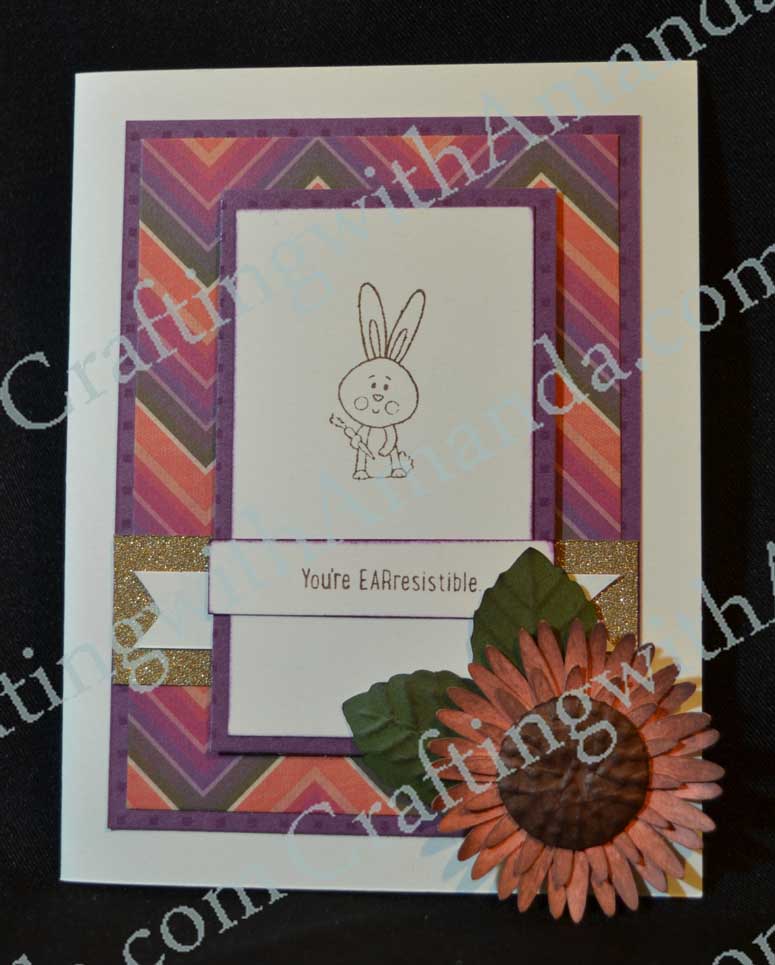
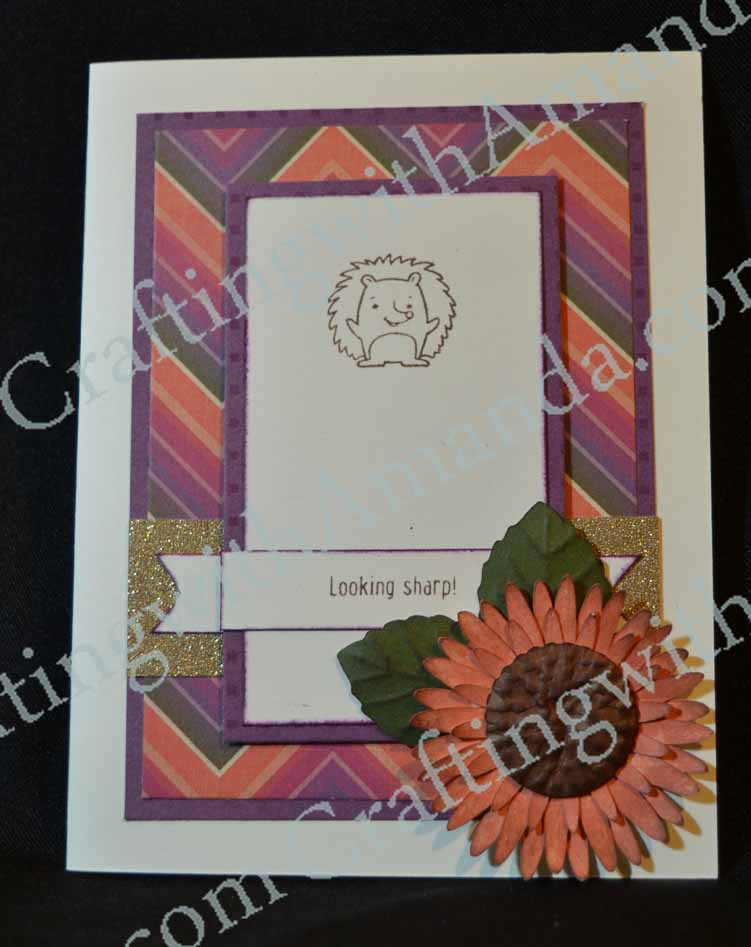
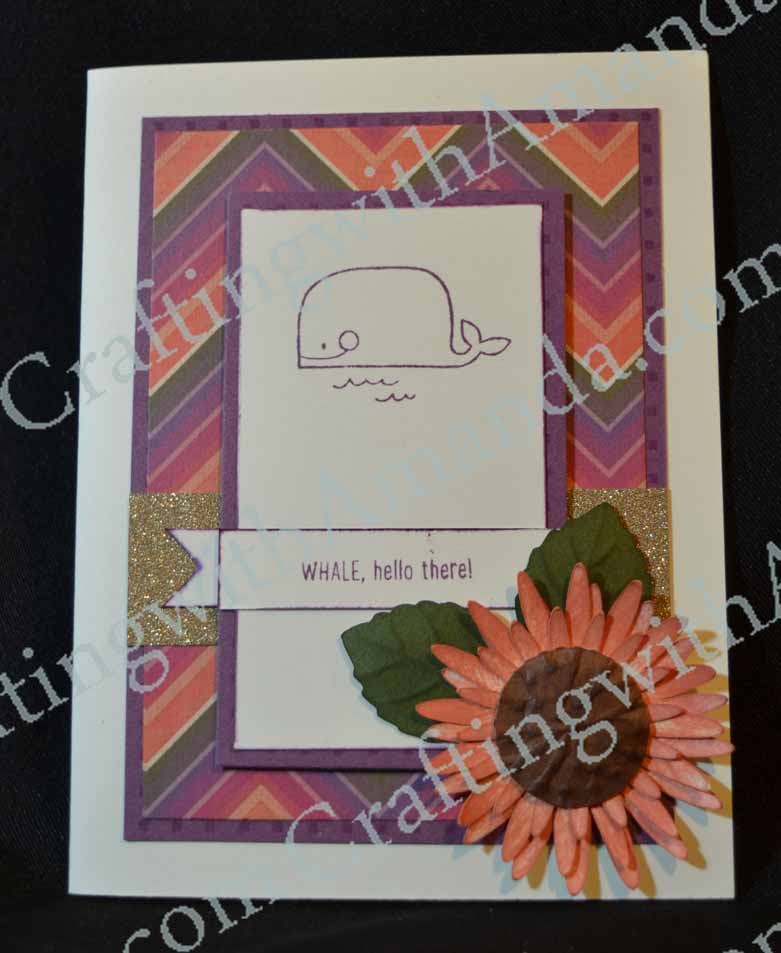
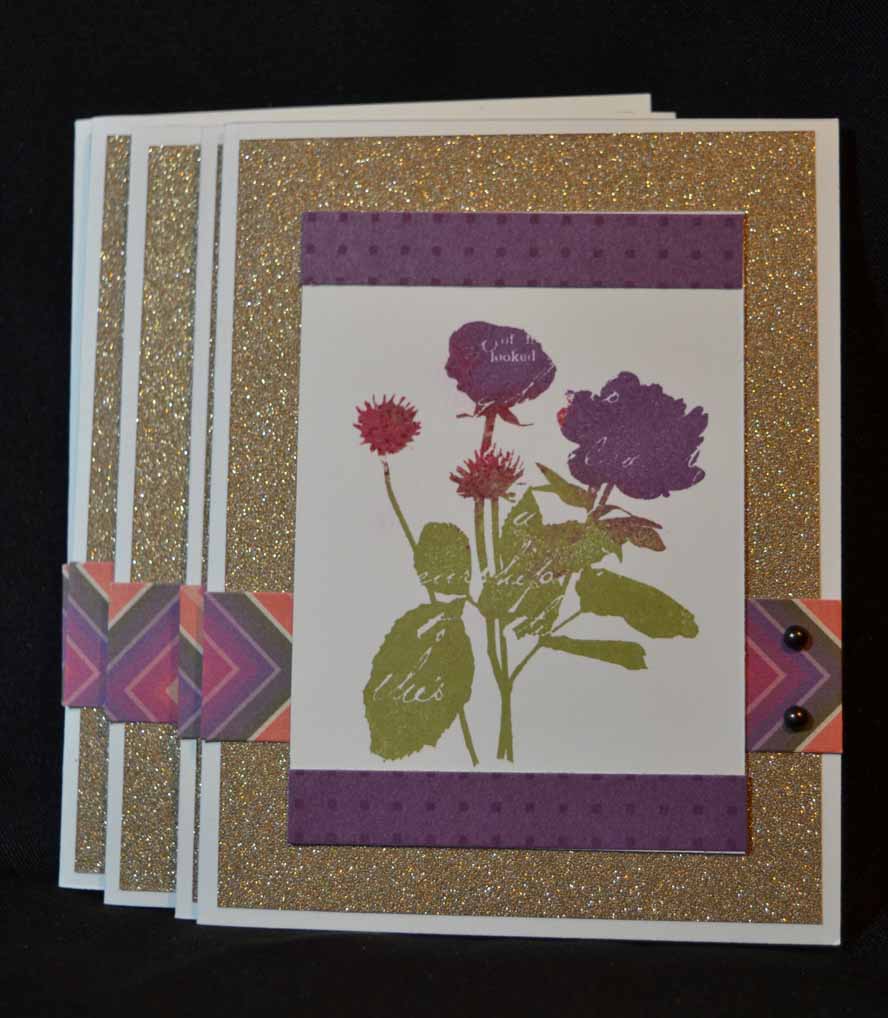
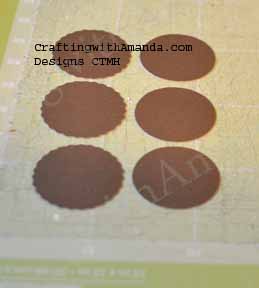
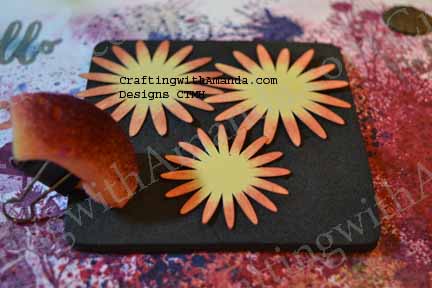
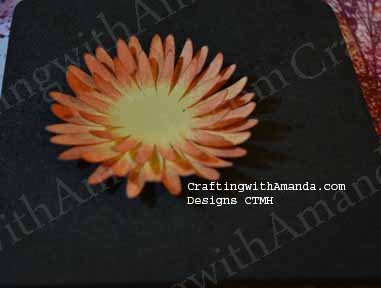
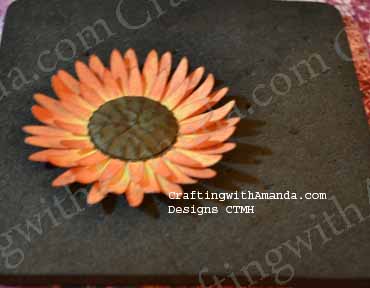
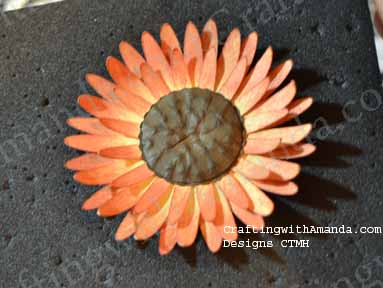
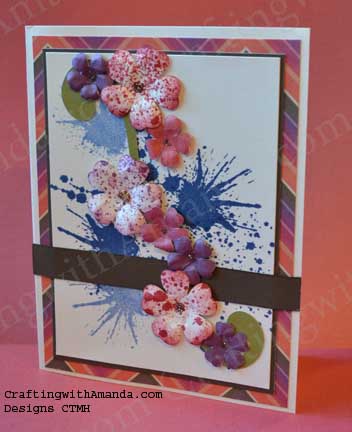
First I found the shape flower I wanted.  It happened to be on Art Philosophy.  The paper is Sangria.

swap card1
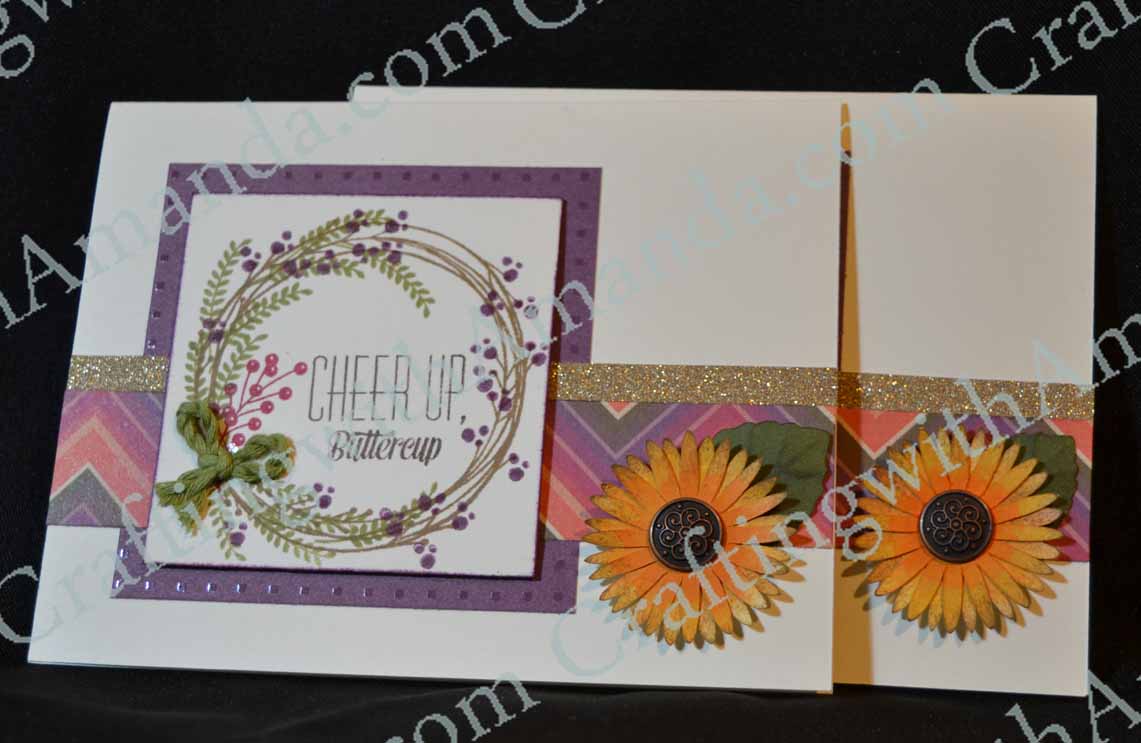
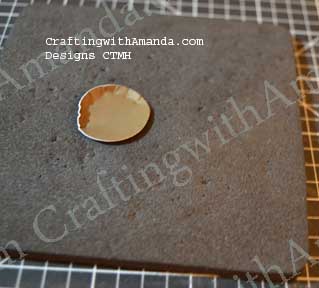
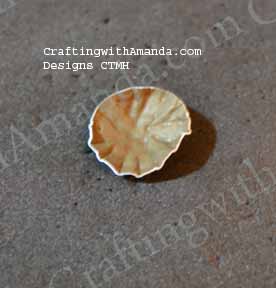
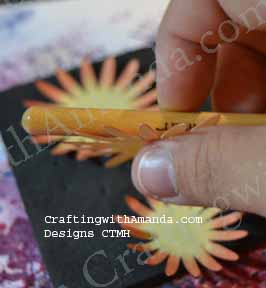
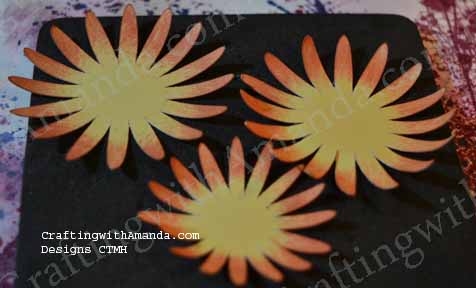
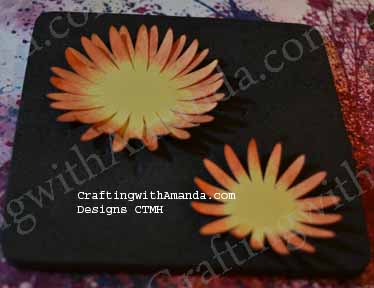
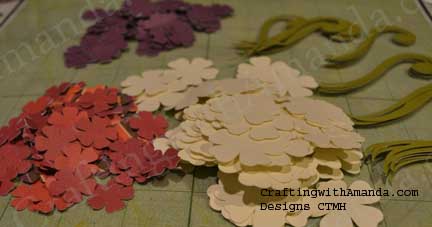
Now I had all my flowers cut I need to make them come to life.  The colonial white ones are a half inch bigger than the purple and pomegranate ones so they are perfect for some color.  Using two of the stamps from Ink Blot I inked some with pomegranate, first and second generation, and some with eggplant.   I let them dry overnight.  (Not that  you need to,  but it was late and I was tired!)  The next day I dry embossed them to curl the edges and make them have some dimension.   I also added a dot of bronze glitz  (which is on sale for only $1.95 while supplies last) in the center.

swap card2
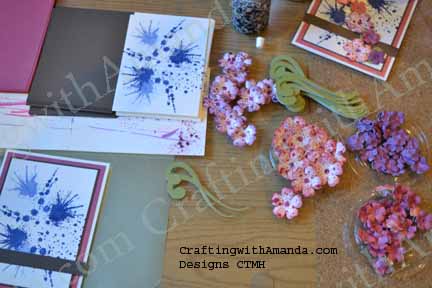
I stamped the main piece of the card using sapphire ink and 4 different stamps from the set.    Once I started to dry fit the layers together,  they needed something.  I added cocoa card stock as a layer directly below the colonial white stamped piece, and another strip across the bottom half of the card.  I think the cards needed to be anchored and the dark cardstock took care of that.

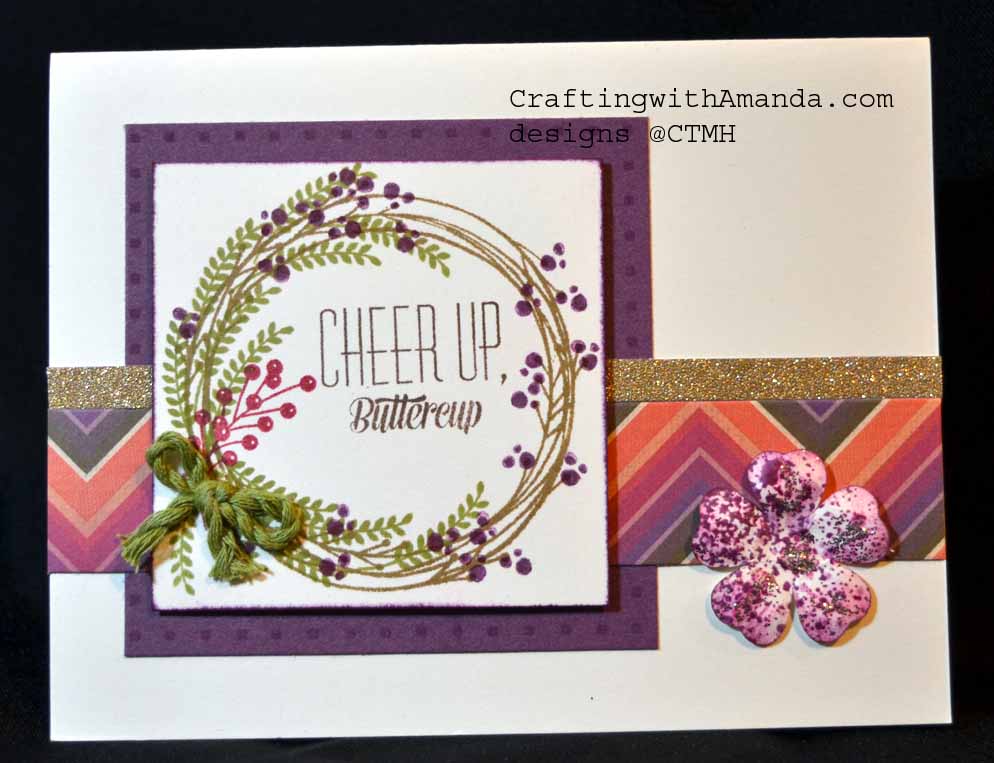
As I am not one to have a “blank” inside,  I did a little stamping inside as well.

swap card inI had some extra smaller flowers left from cutting them out of the B&T paper,  so I adhered one over the stamping on the inside.

swap cardI created these over a month ago, and I really am enjoying  how they look.  I made a few extras so I would be able to share with others, but so far I’ve been hording them in my studio and letting them bring me a smile.   I think it’s time to send one (or maybe two) away from home to let some others smile.

Happy Crafting!


Mum – family flower Tutorial

As I’ve been posting some of my cards with the big sunflowers on them,  or colorful mum like flowers,  I’ve been asked how I do them.  I tried writing out instructions,  but some were still confused,  so tonight I created another flower and this time took photos as I worked.  So are a bit blurry,  but I hope you get the idea.

Step one.  Cut your flowers & centers out on the cricut.  I used the Art Philosophy cartridge.   Cut 2 <Flower1> (Shift 1 ) at 2.5″ and 1 <Flower1> (Shift 1) at 2″  I then cut 1 smooth <circle1> (1) at 1″ and 1 scallop <circle2> (q) at 1″  Now you have all the pieces you need to create one flower.

sunflower1To make the centers look more “real,”  I took my small round stylus and gently poked dots starting at the outside edge and working toward the center on the smooth circle.

sunflower2Ends up looking like this.

sunflower3Next I attach some pop tape to help it hold it’s shape before I use a sponge and rub ink over the dots.

sunflower5

I also ink the edges of the scallop circle and normally the edges of the smooth, now dotty circle, but didn’t so you would be able to see the layers better.

sunflower4

sunflower7You’ve just created a sunflower center sandwich  🙂

Next you get to play with the flower petals.  In this example I used sunset ink to add color to all three of the flower petals.

sunflower8

sunflower9To give the flower a natural look,  I curved the petals by pulling the handle of my piercing tool over them.  (if you ever curled ribbon for a package with scissors it’s kind of like that.)

sunflower10

Now you can start assembling all your components to create a stunning accent to any of your projects!

sunflower11sunflower12sunflower13sunflower14sunflower15

Here are some of my creations using this flower.

NeverMore-SeptSOTM_frontpathfinding_APZoe&Blossom_Card

Happy Crafting!