Cards

Babycakes Chocolate Card

I’m trying to keep my Thursday for crafting days.  It’s getting off to a rocky start,completed card but I have managed to put together one card with the supplies to do another one quickly.  Here it is!
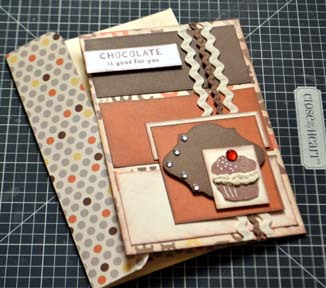
I started with one sheet of Babycakes paper  and cut a 4″x12″ strip.  I made a top fold card with the letters on the outside and the dots for the inside.

I then cut 3 strips of cardstock, size 1.75″ x 3.75″, one each from Chocolate, Autumn Terracota & Colonial White.    I was using a card from the Make It From The Heart Vol 2 as my inspiration.augustsotm
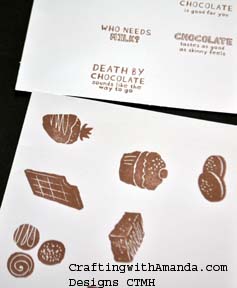
 

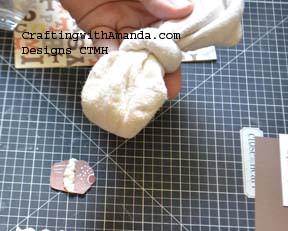
I had stamped the images from “A Chocolate Affair” (Aug Stamp of the Month that you can get free with a $50 purchase) and cut out some of the images.  After deciding on the cupcake and the sentiment, I need to figure out how I wanted to use them on the card front.  I cut the medallion piece using the Art Philosophy cartridge and then decided I needed the 2.5″ x 2.5″ piece of Autumn Terracotta CS to mount it on.    babycakessockI put the cut out cupcake on a rectangle of colonial white cardstock and to help it stand out from the autumn terracotta strip I added a small piece of colonial white behind the square.  The cupcake needed some dimension so I added liquid applique to the center layer and then using my heat gun puffed it to look like whip cream.  The liquid applique can leave a sticky residue, so I have a baby sock filled with corn starch that I tap over the puffed liquid applique and it takes all the stickiness away.
directink

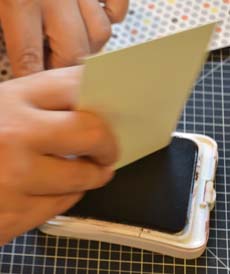
Some of the pieces I used a sponge to put chocolate ink along the edges, but others I dragged the paper along the ink pad.  You get a finer edge when you drag it verses using the sponge.  I will use both techniques often.
babycakespopdot

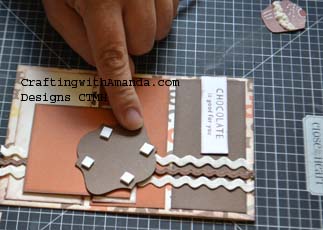
After adding both colonial white and chocolate rickrack ribbon, I placed the large square and then pop taped the medallion and cupcake to it.
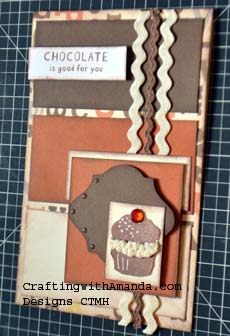
babycakesliquidglassAfter adding the “Chocolate is good for you” sentiment with pop dots on the top left, I put 5 dots of liquid glass (my favorite adhesive) on the left edge of the medallion to secure the sparkle gems I am still trying to use up.  (Side note, sometimes when things are on sale, they really aren’t worth it.  I purchased a pack with 100s of unglued sparkles thinking how great it was.  Only liquid glass has prevented me from throwing them away.  I only purchase pre-glued gems now, and also have learned that CTMH gems the glue stays with the gem and actually will attach well to your project.)

Now we’re on the home stretch.  The inside needed a base for me to write on, so I added that and the two little ends that remained from cutting my strips for the front of the card.
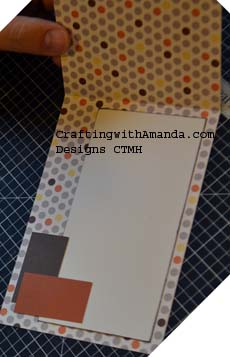
babycakesinside  Because CTMH paper is thicker than most papers on the market, it can easily be used as a card base (or scrapbook base for that matter.)

Now I just have to customize my envelope.  (I don’t like it when the envelopes are too big, and I like getting three bases out of my 12×12 sheets.)    So, to start I seal my envelope closed, then I cut 1/2″ off the long side (top).  I attach a piece of pattern paper that I’ve scored at 1/2″ along the long edge (2″ wide x length of envelope).  I glue the small 1/2″ flap to the front of the envelope and fold the rest of the paper over to the back to make the flap.  I like to use a corner rounder to clip the two corners on the flap.  You’ll need to use adhesive to seal the envelope before you send it.

Here’s the completed cardfinal card and envelope.


Happy Crafting!


August Club Night Project


JulySOTMcardoutsideYes, I have the project for next club night all figured out!  phew.  Now that CTMH and their supplier of our alcohol markers have achieved full manufacturing of them I am ready to teach a class on marker coloring.  Alcohol markers are very different from ink markers, and thus require a different approach.  I’m not going to go into details today as a tractor is warming up for me, but I promise to publish something later.  I hope to have a hand out for club night, so I’m sure I can link something on here once I get the write-up instructions done.

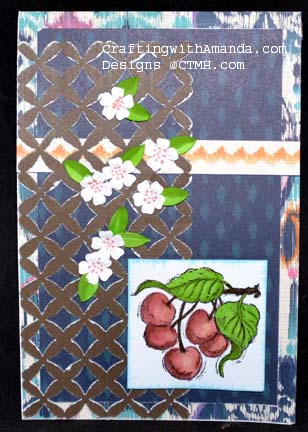
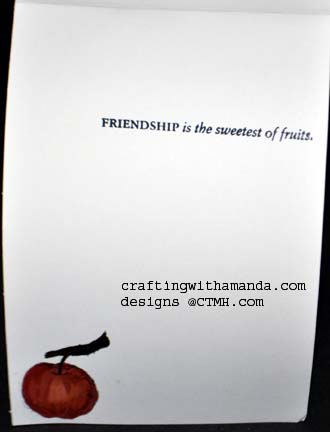
Now, on to the assembly of this wonderful card.  I used a piece of patterned paper from the new Sarita papers.  I cut it 4.25 x 5.5 then cut a .25 frame and flipped the inside rectangle over to create a matted effect.  I used the zip-strip from the top of the paper and cut a 4.25″ piece.  I put this over the patterned paper. Using the new Artbooking cartridge I cut the lattice out of chocolate cardstock. (I lent my cartridge to another consultant, so I can’t tell you the page number right now.)  I lightly sanded the lattice letting the white show through.  Using a 2×2 white daisy cardstock square I stamped the cherries using our black pigmet ink.  While I waited for the ink to dry (pigment ink takes longer, sigh), I cut seven 1/2″ flowers from the Art Philosophy cartridge p50.JulySOTMcardinside I also cut a branch with leaves on it p43 out of pear cardstock.  I removed the leaves from the stem and folded them to give them character, then put dots with a ruby marker in the centers of the flowers.  I use the rub on tool to cup the flowers, then turn each cupped flower over and again using the rub on tool rub only the center of the flower to make it have dimension.   (I’ll try and get a better photo of that for you.) By now the pigment ink had dried and I colored in my leaves, branch and cherries with pear, ruby, blush, and the blending markers.  (more on the technique later.)  I sponged the edges of my 2×2 square with sky ink and pop dotted it on the lower right corner of the card.  The inside of the card used one of the sentiments from the July Stamp of the Month along with part of the apple stamp.  (The card isn’t really bent, but I couldn’t get it to stand up for the photo.)

Hello Tweety

tweetcard

Can you tell I need birthday cards?  I’ve been making them almost exclusively lately!

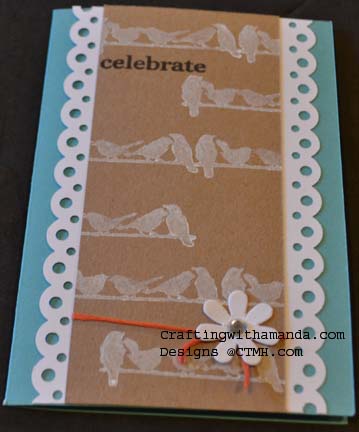
This is a straight forward card as far as techniques go, but packs a punch with it’s design.  A fellow consultant and friend,  Erica, designed this card for us to create.  She used the Hello Tweety stamp set with Colonial White ink on a kraft cardstock strip.  We used our cricuts and the border from p65 of Art Philoshopy to create the white daisy edges.  Our card base was lagoon cardstock (4×6).  By varying where we started stamping our birds on the wire, we were able to create many different arrangements of the birds together.  I used sorbet string left over from an old sorbet mini medley pack, but bakers twine would work well there too.   Keeping with the theme of using up left overs, the flowers were from a grab bag I received at a crop.

We each created 4 of these cards, but varied the card color for the bases.  It was great getting four more birthday cards to add to my stash.  I really seem to be going through them now.

Hope you have a crafty day!


Home and Crafting again – Masking Technique

Well, I made it back from leaving the kid’s at my Mom’s house.  Her root canal got postponed a day, but I’m sure everyone will be just fine.  The kids loved going to VBS today, and were already looking forward to going tomorrow.

As the house is quiet, I decided to continue the assembly of the card sets from my May weekend.  (I’m getting closer to being caught up with my UFOs, unfinished objects.)

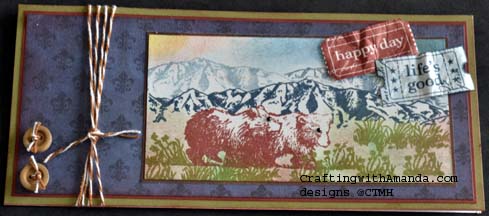
So, here it is.bearswithmasking

I used a retired stamp set, one of my favorites, called raccoon and friends. To get the bears to be in front of the mountains, I used a technique called masking.  I will try and explain what I did.  First I stamped the bears on a scrap piece of paper and trimmed closely around the image.   After I trimmed the image I used the two way glue and applied it to the back of the cut out piece.  I then stamp the bears in Chocolate ink on my project.  Making sure the two way glue had dried and was not repositionable, I covered the stamped image of the bears on my project.  This allowed me to ink up the mountains in outdoor denim and stamp them on my project.  Using the same masking technique as the bears, I masked the first (darker) mountain range and without re-inking the stamp stamped the mountains again.  This made them lighter in color (2nd generation stamping) and once again pushed them behind the first mountains.  I removed the masks from the mountains and the bears and proceeded to stamp the grass.  I used sponges to create the colorful sky.

sunsetsponging

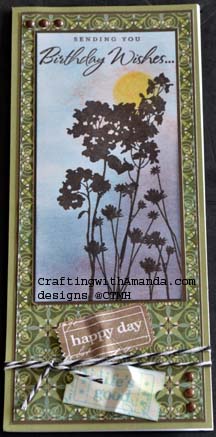
Here is another example using the same sized pieces, but arranged vertically.  I used masking in a different way on this card.  I punched a 1/2″ circle out of CS and after swirling some honey ink, I placed the circle on the honey ink then used sponges to create the sky background.  After I was done and removed the circle mask,  I got a sun behind my silhouetted flowers.

I am squeezing in my crafting time right now, but soon I will start taking photos of the process (and use stamps that are available to order, sorry).

Have a crafty day.


Where’s the creative time?

I got to golf today and it wasn’t raining.  This in of itself is unusual for July.  In addition to that, I actually felt pretty good about my playing (other than a couple of shots, I was pleased with my ball striking.)

Next I came home, packed the kids up and we heading to the Sault for some errands.  We had lots of success and they should be ready to head to Grandma’s on Friday.  Sunscreen, new swimsuits, new shoes, a sundress for the girl and snacks.  I also picked up some necessities for the house.  With the 95+ temps and HIGH humidity, it was all I could do to bring the bags in and put the few cold items away.  Dinner still needed to be fixed and as I didn’t have a kitchen sink I needed to tackle that too.

So, now dinner is over, still missing a kitchen sink, but I decided it was creative time.  I’ve learned that crafting makes me happy and I’m much nicer to be around when I’m happy!  I highly recommend finding some creative time each day.  It doesn’t have to be long, but if I set a timer for 30 minutes I tend to stay focus and get something done!  I have some cards that were cut out for a May scrapbooking weekend, but just haven’t had time to assemble/stamp/embellish them.  This was a perfect place for me to start.

I’m making 4 (or 5 sometimes) of each of the cards, so I can just repeat what I did for the first one and wah-lah I have 4 cards ready in no time.

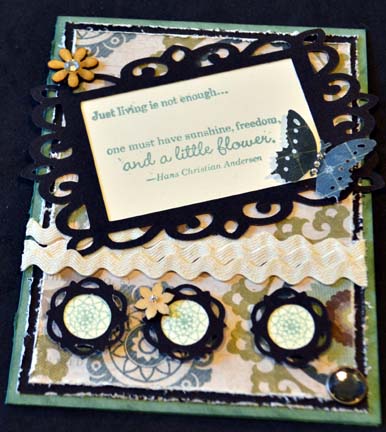
Here is the card. and some instructions.

avonlea  I cut a 4×12″ base (that way you can get three from one 12×12) out of juniper CS and top folded it.  I then cut a
mat that was 3.5 x 5.5 out of black CS.   Using the Cricut Artist cartridge and my gypsy (You can do the same on
Cricut craft room), I modified the image on p60 to be a rectangle rather than a square.  I also cut 3 of the
lacy circles for the bottom, both out of black CS.    I used a 3.25×5.25 piece of paper from the Avonlea paper pack . I used Colonial White CS for my sentiments and centers of my lacy circles.  I stamped a circle flourish with juniper ink in the circles.  I punched a butterfly using a neighbors punch.  You could cut one from the Cricut Cartridge Art Philosophy too.  Added rickrack Colonial White ribbon and using the distressing tool roughed up all the edges of the base papers.  The flowers are  wooden flowers from trinkets wooden shapes.

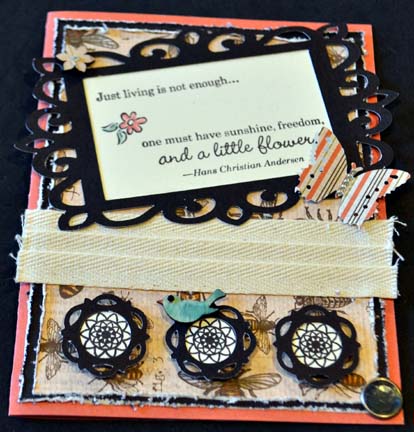
I’m including the same card using Buzz and Bumble paper, so you can see that too. The base is Sorbet CS.buzznbumble